


")

 Guide")


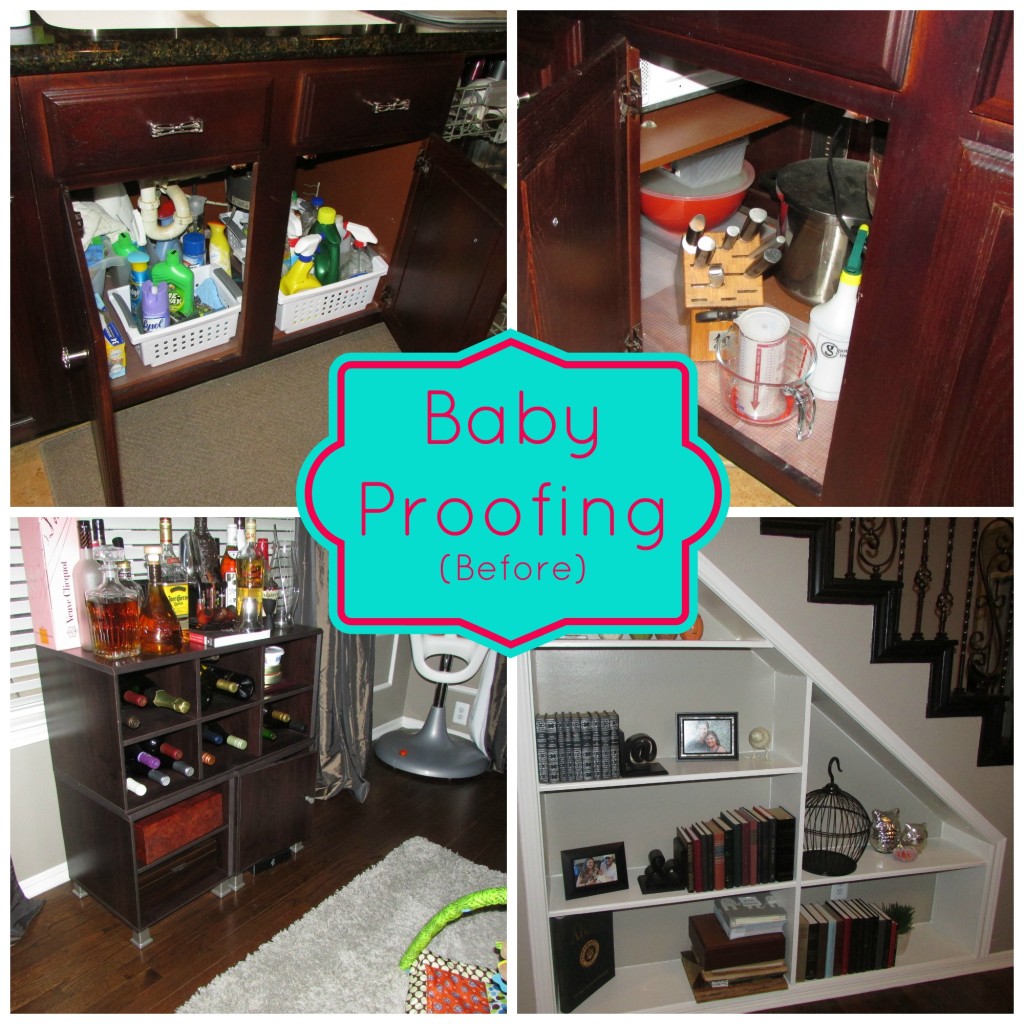
With the prospect of a crawling baby on the horizon, it’s time to start baby proofing our death trap home. With just a 5 month old, you may think that I’m starting this process a little early. However, I will argue that there is much to do at our house, and I need to get started immediately – we keep knives at the bottom of our island people! {See picture above for proof.} Originally, I thought this would be an easy, weekend project until I got overwhelmed in the aisles of Babies R Us.
Our project has only just begun, but I wanted to share with you some tips for getting started.
Tips for Baby Proofing Your Home – Part One
Make a List Room by Room
Do not dare going to the store unarmed without a list of what you need. Making a list is key! Walk through every room of your house very carefully, and make a list of what needs to be done and items that need to be purchased. Be sure and count outlets, test furniture, and open all cabinets and doors. Taking pictures of each room may help too. Walk through with a partner to make sure you notice every detail. Two sets of eyes are better than one!
Don’t forget to think about each of these things :: TV’s, large pieces of furniture, cleaning supplies, door stops, plug-in air fresheners, toilets, firearms, oven doors and other appliances, and baby monitors. The number one ding we got on our walk-through was our video monitor. We had it just sitting on the crib which can be a strangulation hazard. Needless to say, it’s now properly mounted on the wall!
Take It To The Floor
A tip I heard from Rosie Pope on Bravo’s Pregnant in Heels {see, reality TV can be informative!} is to get on your hands and knees and crawl through each room of your home. This will show you exactly what baby sees and all of the items that pose a potential danger.
Call in the Experts
If all of these things seem too daunting {like they did to me} call in reinforcements! I called in the experts from Kid’s Safety Solutions, a local team who also owns the fabulous Baby’s & Kid’s 1st Furniture. Both my husband and I work outside of the home on top of being first-time, extra-worried parents so we opted to take advantage of the free in-home consultation offered by Kid’s Safety Solutions. Trust me when I say we needed professional help! These experts will walk-through each room of your home talking to you about what needs to be done. Within just a few days, they send you a neat list of everything that was discussed. At this point you can either hire them to install all of the products, do it yourself to save the cost of labor, or do a mix like we plan to do. My husband and I plan to tackle the easy tasks like outlets as well as locks and rearranging, but we will need assistance with things like installing the gates and fireplace covers. Even if you decide to take on everything yourself, you are left with a perfect shopping list of the products that are needed {all can be purchased through Kid’s Safety Solutions} to get the job done and peace of mind knowing that you are purchasing a quality, tested product.
One thing that is very important to me is having our home still look nice and be functional for adults. Kid’s Safety Solutions knows all of the perfect products to use that will be effective for baby but will blend in with your decor and not scream HOME WITH KIDS!
Start Early
I recommend starting early. Not only will this give you an ample amount of time to complete your house before baby is mobile, but it will give your pocketbook a break. Tackling one room at a time will spread the cost out rather than taking a huge hit.
Now it’s your turn! Let me hear your tips on getting started and what your baby proofing experience was like. And if you haven’t started yet, what are you dreading the most?
I look forward to sharing our “after” pictures, total cost, and overall experience once we are done baby proofing. Look for that post in the months to come!
[hr] Please Note :: I am by no means an expert on this topic! Just a first time mommy navigating the process and learning as I go.


")

 Guide")

Is it bad that we didn’t really do much besides the electrical outlets and baby gates? HAHA! This is a great post, though. Never thought of getting on my hands and knees and crawling around – genius idea!
Thanks Meg! I think it is easy to take the baby proofing to the extreme! Hopefully I can find a happy medium.
You are so good, Chelsea! And I cannot wait to see how the rest of your baby proofing journey goes! Our house turned out to be surprisingly baby friendly, and we didn’t really have to do much for Hayes – a baby gate to the laundry room where the litter box is and locks on the cabinets with medicine and chemicals. But I have a feeling we will have to kick it up a notch for Hadley. She is already into EVERYTHING!!!
Is little miss Hadley going to be a troublemaker? I can already tell Jack is going to want to get into everything too!
Yes!! She wants to get into everything her big brother is! T-R-O-U-B-L-E!!!
Man, I wish they had a service like that when I was baby proofing!
It is very nice…especially for a first-time, clueless parent!
This is great information for any parent looking to make their home a little safer for their children. I especially like the fact that you mention getting a professional to evaluate your home to ensure it is as safe as possible. I would love to add that getting certified in First Aid and CPR can help immensely in the case of an emergency. The truth is we can never prevent all accidents from happening no matter how safe we make our home. Having a strong skill set is going to help you when your child gets into something they just shouldn’t. Thanks again for sharing!