


")

 Guide")


Is it just me or is kid’s holiday clothing just the cutest?! I don’t splurge on much when it comes to my kids’ clothing, but I will buy pajamas and play clothes for holidays. Halloween, Christmas, Easter, Thanksgiving, and any other holiday I find a cute shirt for! But sometimes the biggest issue is the finding part. Like when you need to find 3 matching boy shirts and 3 matching girl shirts in a couple of different sizes. {But that probably is just me.}
It all started last Easter. I found adorable outfits for the girls, and nothing for the boys. Nada. And I couldn’t dress up the girls for Easter and not the boys! I mean, that’s just not fun for me. So, my mom put her crafty hat on and made the boys Easter shirts. And they really turned out cute!

Flash forward to our current fall season. My online searching for cute and affordable Thanksgiving clothing {in the needed variety of sizes} was not going well. And the Christmas options weren’t stellar either. So, my mom and I decided to take matters into our own hands. We made all the kids’ Thanksgiving and Christmas shirts ourselves. And let me tell ya, it was easier, quicker, cheaper, and CUTER than I expected!

Step 1 :: Pick Your Design
Pinterest is a fabulous resource. Just search for “Thanksgiving shirt DIY” or “Christmas shirt DIY” and you’ll be overwhelmed with possibilities.
Step 2 :: Get the Supplies
You will need a plain shirt, piece of plain white paper, roll of freezer paper, craft knife, iron and ironing board, paint in your choice of colors, paintbrushes, and any embellishments you desire. I will say, for me, finding plain white t-shirts was the most difficult part of this project {might have been because I needed 12 shirts}. I had the best luck at Wal Mart, Hobby Lobby, and Michael’s.
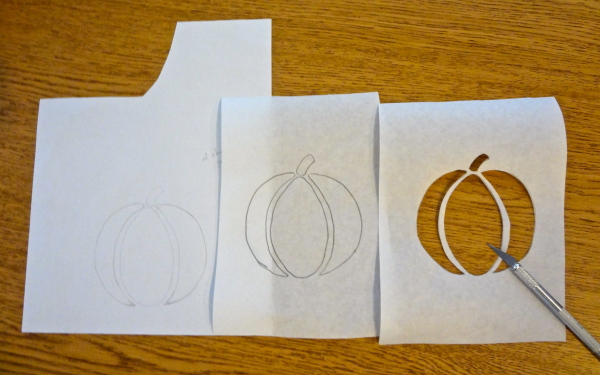
Step 3 :: Draw Your Design
No artistry needed! Just free hand copy the design onto the plain white paper. You may need to do this several times to get the sizing and details to your liking.
Step 4 :: Trace Your Design
Once it’s complete on the white paper, lay the freezer paper over and trace. When you’re done you should have your design of choice drawn on the freezer paper.
Step 5 :: Make a Stencil
Bust out that craft knife and cut out the openings in your tracing. You are making a stencil to use when painting the shirt, so don’t get too crazy with the craft knife.
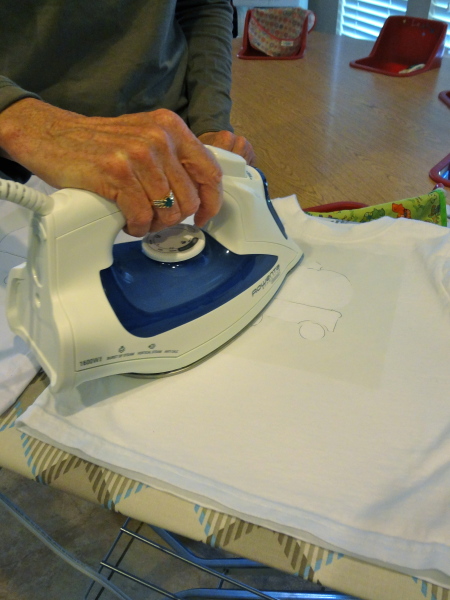
Step 6 :: Make it Stick
Gently iron the stencil onto the shirt, waxy side down. It should just stick enough so that paint won’t bleed through.
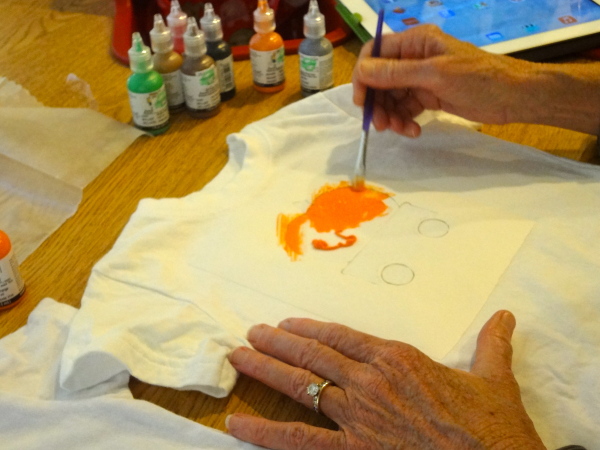
Step 7 :: Paint
Fill in your stencil with whatever fabric paint colors you like. Two coats may be necessary. It never hurts to put a piece of cardboard or wax paper inside the shirt to prevent bleeding onto the back of the shirt. Be creative! This is the fun part!
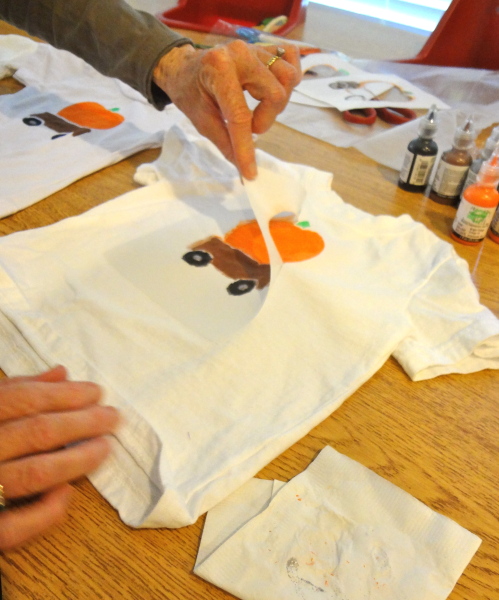
Step 8 :: The Reveal
Be absolutely positive the paint is 100% dry before doing this step! Peel back the freezer paper to reveal your painted design.
Step 9 :: Finish Up
This is when you can add any desired embellishments or details you can’t stencil. Whenever you feel it is complete, let it dry some more, and Voila! A new holiday shirt for your kiddo is done.

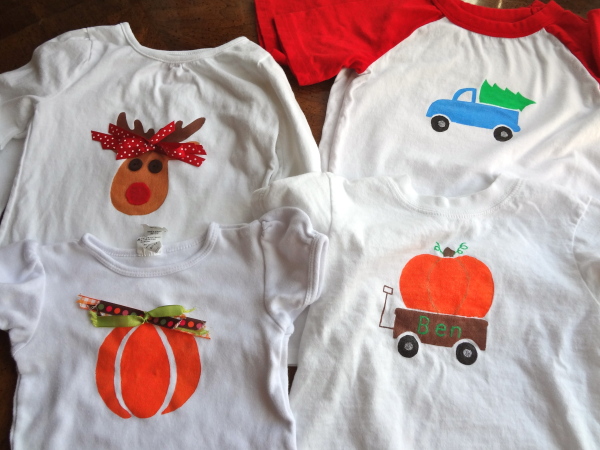
I just love all of the shirts my mom and I created! We are hooked on this DIY idea.
What do you do for your kids’ holiday clothing? Favorite store? A different DIY method? Please share!


")

 Guide")

These are super cute and just what I was looking for!!!